Showing posts with label resolutions. Show all posts

Monday, September 8, 2014

Fourth-quarter resolution checkup

I thought it might be interesting to look in and see how far I have (or haven't) come with my resolutions...I originally started writing this post somewhere around June, but it's taken me this long to get around to publishing it...which probably doesn't bode well for my resolutions, does it? This means I consider it accomplished, and this means I don't

Scrapbooking:
  • Get pictures printed! This is step #1 in completing all of those pages I need to finish, obviously. 
  • Get to work for the first time in years! Once I'm in the zone, I can usually crank out quite a few pages a night, but it's hard to get started without a dedicated table/place where I can leave my mess out, so my goal is to keep my coffee table clear of everything but scrapbooking stuff and allow myself to live with the mess when I'm in the middle of pages. I have made quite a few pages so far, although, since the move, it's all been packed back up again.
  • Most of my supplies are organized by theme, but not quite everything. I need to finish this task, so I can grab the theme I want when I'm ready to work on that page. [This might have to wait a while longer, actually.]
  • I'm not allowed to buy anything new, unless it's something absolutely necessary to finishing a page (which, let's be honest, shouldn't ever really happen with paper and stickers and accessories). I think I'll only be allowing myself to buy adhesives and solid-colored cardstock. Done and done! I've been very faithfully putting back things that I've picked up at JoAnn, returned one Disney-themed paper pack my mom bought, and have only filled a couple of solid-colored cardstock holes.
(Garment) Sewing:
  • Again, I can't buy anything unless it is absolutely necessary to finishing a project. I know that great linings, the right zipper, perfect buttons, etc. can really finish up the look, but let's be honest - I am a complete novice at sewing and it's unlikely that replacing stash pieces with store-bought perfection would actually perfect my garments. For now I just need to sew, and learn as I go and refine skills, and then I can worry about perfection once I feel more comfortable. [Realllly failed on this one. My stash has grown significantly, but that's mostly because I can't resist a good garage sale or estate sale. Or the clearance racks. Oops. However, in my defense, I've been using some of the fabrics up very quickly, and have sewn more this year than all previous years combined.]

    [I'm somewhat ashamed to admit that this is only a small portion of what I've bought this year, sewing-wise.]
  • Just start cutting. Again, if I'm being honest with myself, none of my fabrics are pieces that I should be afraid to cut into, as they're not vintage beauties, and they hardly cost me anything. I've got nothing to lose and everything to gain by cutting up so-so fabrics as muslins and practice pieces. Best-case scenario: I have a wearable muslin! Worst-case: I learned better for the next time. The four pairs of shorts I ruined should attest to that. Pair #5 might be make-it-or-break it (it also helps if I use the right size pattern when cutting out my pieces - that was my mistake with #4!). I do have some great success stories, though!

  • Use the patterns I have (and make a list so I stop buying copies of the same patterns!). Most of them only cost me $1 each - if I screw them up that badly, I can buy them again, but they really just need to be used! This was maybe half-accomplished. I did finally cut into three commercial patterns, but I have realized I have a few gaps in my collection (meaning, my collection is almost entirely made up of dresses and nothing else. Oops).
  • Refashion the things I've been meaning to refashion, and if they're not done by the end of the year, give them away! I did a decent closet purge a few months ago and took things to the resale shops, but as my items were out-of-season, the stores had no space for them. They suggested bringing them back in the spring, and since half of these items have never been worn, I'm reluctant to just give them away. So I'll make one more trip in early March, and whatever isn't bought is going straight to the Goodwill! Well, the year's not over, but I have managed to refashion 4 things so far, and I gave away the stuff I couldn't sell. There are still several more things sitting around to be refashioned, but I have faith.
Quilting:

  • Whoa, what? I do not need to start another hobby, but I feel like this might be easier for me to accomplish than fiddling with hems and darts and fit and such. I recently came across this beauty and I know I have a million things in my stash that I could use to get a similar look.  The quilt I linked to is now DONE! It's so far from perfect that it's laughable, but I still like it. I'll be showing that off in an upcoming post, don't you worry. 
  • Make my friend's T-shirt quilt. I probably won't see her again for ages, but I have to stop letting that be an excuse to keep her t-shirts hanging around and haunting me. I've made one of these before, and it's pretty simple, if a bit time-consuming, so it might be just the kick-start I need. Plus, I can always mail it to her when I'm done.  Done and done! It's not perfect, but she loves it, and I got some practice binding, so this is definitely a win. 


Knitting/crochet
  • I actually don't have much of a yarn stash anymore, and it needs to stay that way. I want to try to use up most of the rest of what I have by year's-end.
  • Make a case for my knitting needles, and maybe do some kind of swap to get rid of duplicates and fill in the sizes I'm missing. [This has been placed on the back-burner for now...]
  • Start taking projects to my boyfriend's place. That way I can feel like I've accomplished something while he's playing video games. Although he's no longer in the picture, my finished cowl can attest to my success with this one! My sweater has been lingering, but I've only got about a sleeve and a half left to go on that one. Maybe I'll actually be able to wear it by the time the winter gets here!
  • Figure out how to finish the project I started using leftover yarn from my granny square quilt. I...have no idea at this point. It's not long enough to be a scarf, and not quite halfway to being a decent sized blanket, so we'll see.
  • Finally knit an infinity cowl. I wanted one last year, but never got around to it. I still want one, and may just have enough matching yarn to make one this year. If I keep it simple (no fancy patterns), it should come together pretty quickly.  
Well, there you have it, folks. Not a total win yet, but I've still got a few more months, right? How are you coming with your resolutions?

Wednesday, May 21, 2014

New Summer Dress

I did it - I made one of the dresses I talked about in my last post!


In that post, I said that I was DYING over this outfit and wanted to try to knock it off: 


Well, my look obviously looks NOTHING like this, but I still love it! (That being said, if I find some blue floral fabric like that, I am snapping it up RIGHT away to make another one of these.) Part of my love for this dress is due to the fact that this is my first completed make from a commercial (big 4) pattern! I did try it on with my jean jacket, but it didn't really work, so I switched it up with this new ivory cardigan instead.

[I swear I'm not pissed in these photos. I still haven't perfected posing and smiling for these photo shoots. But isn't the mural awesome?!]

I used Simplicity 4070, view A for the bodice, along with some small-print floral quilting cotton. The skirt is self-drafted with soft box pleats some heavy knit fabric from my stash  (with probably enough left over for a skirt on another dress!). 


I obviously added some straps, which are still a bit too long, and used some heavy cotton lining I recently bought. Despite the heavy knit skirt and lining, I think this will be a very light, wearable dress for summer. 

I used a double needle for the hem, but didn't get it quite right since I couldn't figure out how to keep the threads from twisting. I do think it makes for an interesting detail, though. I used white thread because I didn't have a blue that matched closely enough - I thought complete contrast was better than not-quite-matching, though I might go back and redo that at some point.


I don't have a good close-up of the detailing, but I am SUPER proud of the topstitching on this make. (And though they look like polka dots in this picture, they're actually little flowers.)

Other than that, I cut a straight size 18, and it fit pretty well right from the pattern. The only issue I had was with some underarm gaping, which I think you can tell from these pictures that I fixed pretty well. :) This happens to me with a LOT of store-bought tops I buy, and it bugs the heck out of me. Luckily, I can fix it pretty well myself these days. For this dress, rather than ripping the whole thing apart, I just added some underarm dart-type things, which smoothed out very nicely. 

I definitely think this will be a go-to pattern in the future, especially once I modify the pattern pieces a little to match where I took this dress in.


(There are no pretty pictures of the inside, because it's really not all that pretty. The one picture I had of the back was also really blurry. I think my zip insertion is still a bit wonky, but the friend who took these pictures assured me that it looks fine, so yay for that!)

I know a lot of people have some very strong opinions on using quilting cotton for garments, but I figure it's good for me to get some practice with whatever's lying around. Once I make my way through my stash and allow myself to really start buying again, maybe I'll sing a different tune. What are your thoughts on the debate?

Monday, May 19, 2014

Me-made May, Week 3

This week was a bit hit-or-miss, honestly, mostly due to the CRAZY weather:


Day 12: Floral Tania culottes

I tried to mix up the styling with these so I wouldn't look like I was wearing the same outfit every week (mayyybe twice/week) - I thought the green tee might give it a more casual vibe, but looking back on this, I definitely can't say I love the outfit. I might just have to stick with my original styling.

Day 13: Self-drafted dress

Wayyyy back in the day when I posted about my maxi skirt refashion, I said that I'd done something else with the top of that dress and that I'd post about it "soon" Well, consider 2 years later "soon" for the purposes of this post, okay? The top is what was left over from the original racerback dress, and the bottom is a 25 cent Goodwill skirt that I took the zipper out of and stitched to the top. I wore this dress a handful of times right after I made it, but for some reason it fell out of rotation. I think I felt that there were some fit issues around the butt, but I didn't notice them this time. This is definitely not the best-made dress in the world, and can certainly not be worn without a cardigan and a belt, but I have to say that I really loved this styling. I felt chic and comfortable all day long (and the girls looked great, which was an instant ego boost!). I think the mint cardigan really helps make this fresher and more spring-appropriate.

Day 14: Refashioned dress from a maxi skirt

After ages of purgatory in my "refashion" pile, this dress finally makes it back into the rotation. When I first refashioned it from a maxi dress a couple summers ago, I liked it and wore it pretty often....and then I lost 20 pounds and it kept falling off of me. I FINALLY got around to taking out some of the extra width the other day, so was happy to put this on. Again, this is not the best-made garment in the world - there's a lot of extra poofiness in the back, and it still falls down a little. Thankfully, one of the many wonderful qualities of jean jackets is that they can be thrown on over almost anything and cover up quite a variety of sins. I love the floatiness and the subtle mullet hem on this (I really never thought those last few words would escape my mouth (or fingers, as the case may be)). I think I'll definitely be wearing this a lot before the weather gets too hot for jean jackets.


Day 15: The weather was cruelly cold, and I had an event to go to in the evening for which none of my me-mades would have been appropriate. I hate to admit that I didn't even bother to wear handmade jewelry that day, but I did only pledge to do 5 days/week, right?

Day 16: Self-drafted striped tank

Another cold, rainy day, so this was the most I could be bothered with, both outfit-wise and picture-taking wise (it's REALLY a horrible picture, sorry about that).

Day 17: Self-drafted maxi

It was my friend's graduation (congrats, Alisha!), so I needed something a bit more formal, but still comfy and warm. I love that I have a million purple things that go with this - I decided to switch up the cardigan a bit, and also wore a darker purple scarf with it while we were outside. Also, I feel like this is the 14th time I've worn this dress since I made it - maxis for the win!

Day 18: I did not get dressed and therefore have nothing to show, but I DID spend the day in my PJs making the dress I'm wearing today (and one of the things I mentioned in my last post was on my to-do list), so...kudos to me? 


We're now more than halfway done with Me-Made May! How are you doing with your pledges?

Thursday, May 15, 2014

Stripey Tank

You may have noticed my reference to (and picture of) an unblogged self-drafted tank top in last week's Me-Made May roundup. Well, I'm here to show it off some more, and document some firsts for me!

First and most importantly, this top was made entirely from stash fabrics. I know that's the whole point of this blog, and the point of the Stash Diet challenge, but I've been a bit less-than-dedicated to that goal lately.

The red and white stripes were a remnant bought a couple of summers ago, with who-knows-what in mind. It was pretty see-through, so I added another stashed remnant underneath.

There was only about 1/2 yard of this fabric, and it wasn't very wide (I didn't measure, but I'd have a hard time believing it was even 45" wide). I decided I wanted to make a racerback tank, and rather than buy a new pattern, I thought I'd try my hand at:

First #1: Self-drafting!

I used an existing racerback tank that was a bit flowy, but whose fit I liked (aside from the low armscyes that always exposed my bra). I upped the armscyes a bit but kept everything else the same, including the curved front hem and the straight back hem.

However, the fabric wasn't wide enough to get my whole block onto it and keep the horizontal stripes (I thought that vertical stripes on this would look terrible), so I squeezed out the straps (front and racerback) from the remnants. For a bit of visual interest, I decided to make these horizontal, and not underline them like the rest of the tank.

[Wow, my mom was right, the stripes DO make my butt look big!]

First #2: Binding! 

I bound the neckline with help from Sleek Silhouette's easy tutorial, but there wasn't enough striped fabric left to bind the armholes, too, so I used ANOTHER remnant from the stash. 

Honestly, I'm not in love with any of these bindings for a lot of reasons, but for a first try, they're passable. I might try to go back and fix a few things at some point, but I think it's pretty wearable in the meantime.

First #3: French seams!

Still not quite convinced I did these right, so I won't show you any pictures, but it was an interesting technique to try. All of this seaming did mean that the shirt fits a bit tighter than originally intended, but I think it works - a super baggy knit top probably wouldn't have been a good look for me.

First #4: Stripe matching!

Look at that perfection! Seriously, so proud of myself on this one. 

All in all, this is a pretty wearable top, and I know that my pattern will have a good fit as-is - I definitely foresee more of these in my future, especially once I work out a few of the finishing touches.

In the meantime, do you have any binding tips to share?

Monday, May 12, 2014

Me-made May, week 2 (late!)

Wow, week 2 has already come and gone, and I was much more successful than anticipated!

Day 5:

Bottom: Tania culottes, part 2
Top and sweater: RTW

Monday was a lot colder than it should have been, but since I'd JUST finished up my second pair of Tanias, I was dying to wear them. I was definitely a bit chilly, but it was worth it. :) I made this pair quite a bit longer, as I feel almost indecent in my first pair, but ended up making them TOO long. I chopped a bit off the hem and then sewed up with a generous hem allowance. I still think they're a bit too long, especially in the front - I might need to work on that.

Day 6:
Skirt: Refashioned maxi
Top and sweater: RTW


This simple skirt sure has a saga behind it. I wore it quite a bit during the fall right after I made it (2 years ago), but by the next summer, I'd lost some weight and it kept falling down. I wore it a couple of times but it was driving me nuts. I finally sat down a few months ago to take in the side seams using my serger, but without a proper walking foot, the seams were incredibly wonky. I threw it into a corner and FINALLY picked it back up again after I got my walking foot. Miracle of miracles, it now fits wonderfully! This thing is SO comfortable, and the knit is SO soft, that I never want to take it off.

Day 7: 

Skirt: Tania culottes, part 1
Shirt: altered to fit
Sweater: RTW


Silly me, I only took one picture on Wednesday, and it was blurry, so you get this re-used one. :) It was the exact same outfit, though, minus the shoes, and I love it just as much as ever.

Day 8: 
Maxi: Self-drafted from a remnant

I maybe should have planned my outfits a bit better. Monday-Wednesday were pretty chilly, but I wore bare-legged outfits, and Thursday was HOT (Wednesday: 50 degrees. Thursday: 90 degrees), and my legs were covered. I did get several compliments on this outfit, though. :) Much cooler without the sweater, ha. You'll notice I still haven't added those straps...oops.

Day 9:
Skirt: Refashioned maxi
Tank: Self-drafted (as-yet unblogged)
Jacket: RTW

I like to call this look "garage sale chic." It was quite comfy for helping with my mom's MASSIVE garage sale, although the lack of pockets made getting change for people a bit difficult. The morning started off cold and humid, but by 9:00, the gorgeous weather had come around and was here to stay, so I ditched the jacket.

Day 10:

Shorts: RTW (since my attempts to sew shorts have all been epic failures)
Shirt: Refashioned polo
Jacket: RTW

Garage sale chic, part 2. :) The pockets definitely came in handy, as did the layering.

Day 11:

Bottom: Tania culottes, part 2
Shirt: Altered
Sweater: RTW


My second pair of Tania culottes make a second appearance for the week. I got quite a few compliments on these, and the bigger waistband is a bit more comfortable than the first pair. They sit quite a bit lower, which does change the silhouette, but I think they'll definitely be a summer staple with various bright tops.

I also made much more of an effort to wear me-made jewelry, although my efforts to photograph said jewelry have been severely lacking.

Stay tuned this week for more pictures of my self-drafted racerback tank!


Wednesday, April 2, 2014

Crafting ADD, it's got the best of me!

I know, I know, it's been far too long since I've posted. I have not been keeping up with my resolutions very well (on so many fronts, more on that in a minute). Maybe the length of this post will make up for my absence?

I do have 2 quickie projects that I've finished and need to post, but they're not overly exciting, which I guess is why I haven't yet gotten around to blogging about them.

I have, however, been working on about eight different projects that I am excited about (which just means that I have to wait that much longer to experience each of them in all of their glory, oops!):

1. The Aidez sweater, knit in this lovely red yarn that Emma Jayne swapped with me!

[One of the cables is backwards, but by the time I realized, I was too lazy to redo it.]

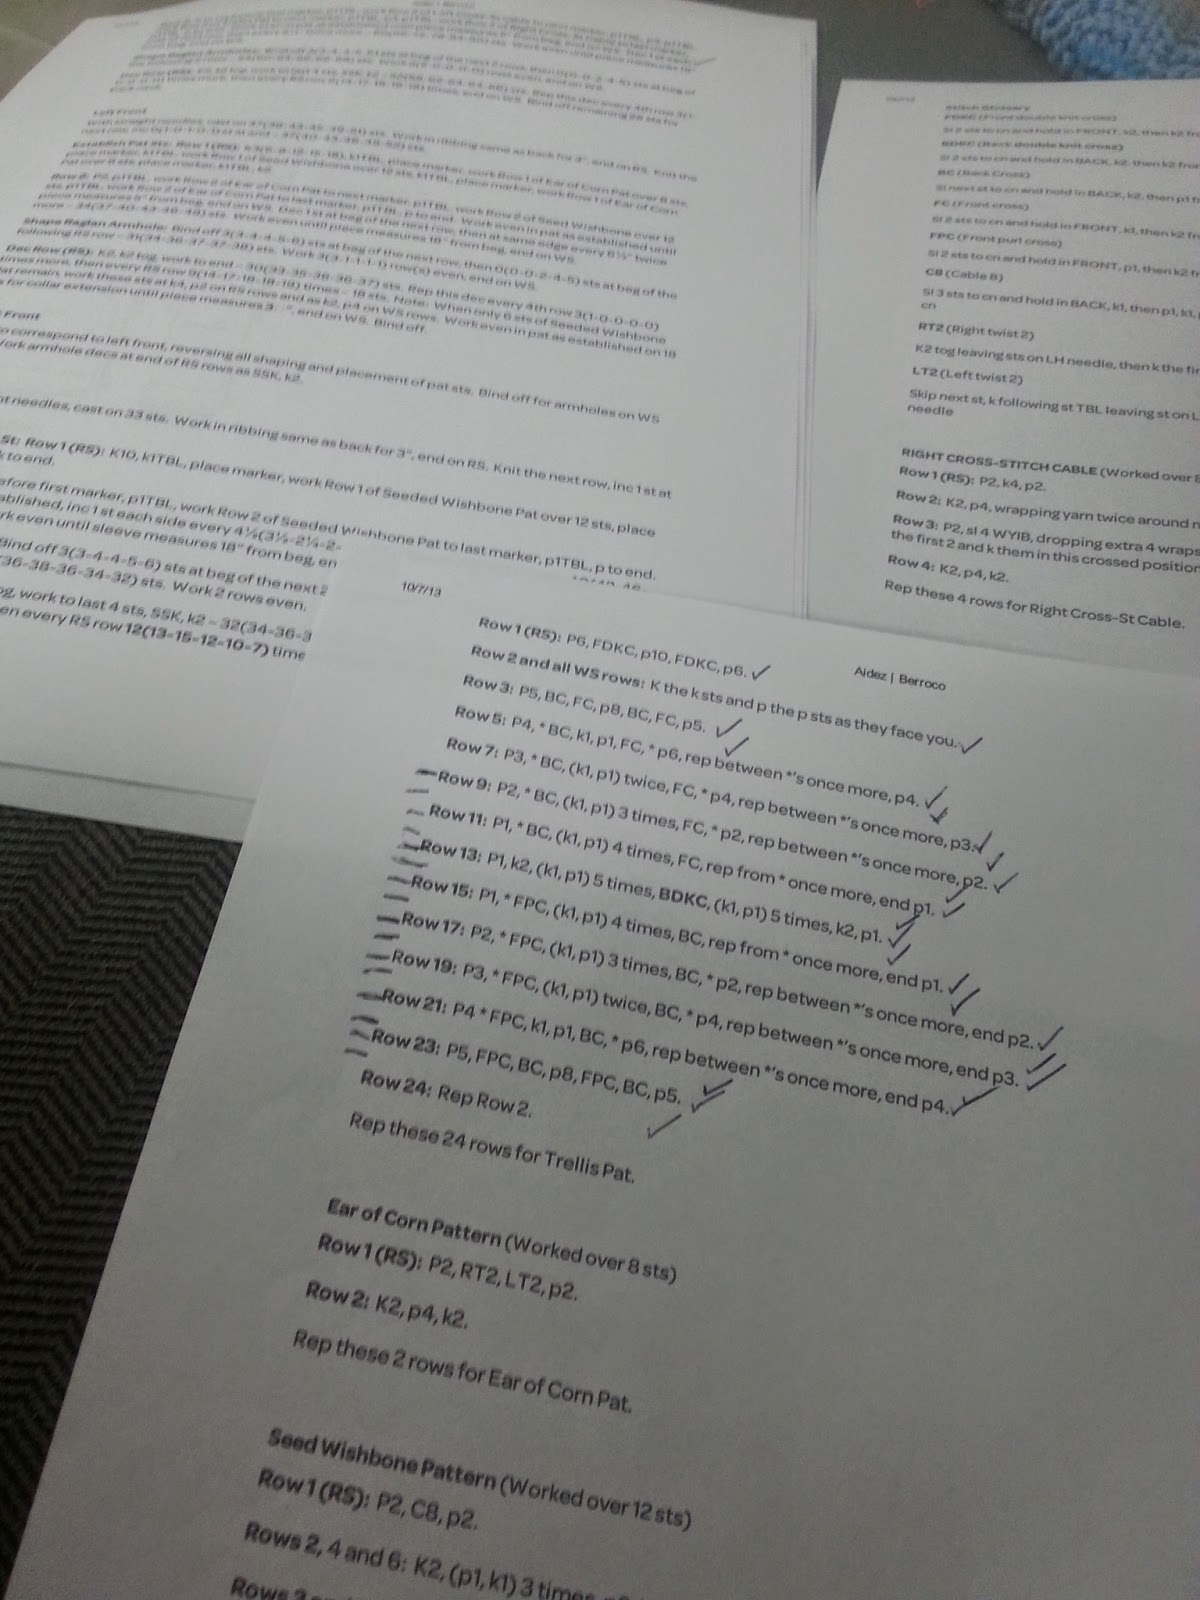
I feel like I'm a fairly proficient knitter, in that I can usually figure out complicated stitches and new patterns pretty easily. I've made gloves (fingerless and fingered) and plenty of little plushies, but have never ever made a sweater (probably because I usually don't buy enough yarn for one!). I considered going with something simpler for a first try, but a friend suggested that I might get too bored with stockinette stitch for the whole thing. I...think she was probably right. That being said, this IS a tricky pattern, and certainly not for the faint of heart! These are the instructions that are spread out in front of me whenever I'm working on it: 


I was chugging along on this faithfully for a while, until I got distracted by:

2. This pattern by Satsuma Street on Etsy. My mom used to do a lot of counted cross stitch when I was a kid, and I guess I just always saw it as an old lady, country-type craft. Until I saw a few of these patterns. So beautiful! I was due for a visit home to my parents and, among the many things I was excited for, one of the main ones was stealing my mom's cross stitching supplies so I could get started on this! Unfortunately, the original weekend I'd planned to go home was a bust because of the terrible weather, so I had to wait patiently (or not-so-patiently) for one. more. week.

[This picture was taken RIGHT after I realized I screwed something up. Oops, so much for the counting part of that "counted" cross stitch thing.]

Thankfully, this is coming together fairly quickly, and I'm loving it! I added quite a bit to my stash with the supplies for this project, but nothing was bought new, really just transferred from one stash to another. And I've modified the colors in this pattern a bit, working with what I have on hand rather than buying the just-right color that the pattern calls for. I already have plans for two more patterns, which are unfortunately much more complicated. We'll see how fast I get sick of it, ha.

3. While I unfortunately haven't cut into much of my yardage (honestly, because most of it is less than a yard and not garment-worthy), I have been cutting into my stash of Goodwill-bought clothes that I intended to refashion. (They used to do this promotion in my town where they'd let you stuff a paper bag full of anything with that week's color tag for $5. You'd be amazed how much could fit...I figure that most of the things I bought during these binges cost about $0.25 each.)

I tried to buy the biggest skirts I could find, so I'd have as much yardage as possible to work with, but I apparently wasn't too successful in all cases. A lot of things were way too small to ever be able to work as a garment for me, but I loved a lot of the patterns, so I started cutting out squares for a quilt inspired by this beauty. (Of course, it's a rainbow.)

[Okay, so I've got a ways to go for my rainbow, but...it's a work in progress.]

4. Pattern weights with the scraps of those scraps above.

[Is that super-efficient, or what?]

5. A pair of shorts, made from one of the Goodwill skirts that actually was big enough to do something with.


First attempt: the butt was way too big. Second attempt: oops, too small. I'm determined to finish these, even if they're probably not wearable, so I can get some practice fitting my Midwestern pancake butt. I have the perfect fabric in mind for them, because...

6. Oops, I haven't been doing so well with my stash diet resolutions. What can I say, I got the shopping bug, found out that my favorite fabric store was having one of their semi-annual sales (up to 90% off, you guys!), and had to stop by on my visit home (it's probably a good thing there's not one of these closer to where I live). I got one new sewing pattern (and conveniently, Gertie has started a sew-along for it!), 10.5 yards of fabric (4 yards of which of which only cost $0.50/yard!), and 3 sewing machine feet (at about 75% off, and I seriously needed them - well, at least the zipper foot). (I mean, I kinda really did "need" bigger yardages, right? The 0.5 yards was for the quilt, and the other 3 fabrics were 10 yards in total, intended for dresses or skirts.)

I was so excited about one of these fabrics, you guys have no idea, because I knew it would make adorable Tania culottes (a pattern I recently acquired through a swap with Jana). I bought the fabric last Friday and cut into it only 8 days later (that's such a record for me). Now, they're almost finished, save the hem. Here's a sneak peak (full post to come when they're finished!):


And the best news? There's definitely enough fabric left to make a pair of shorts (probably enough fabric for 2 pairs, except I know I'll screw one of them up, given my recent shorts history).

7. I finally finished the men's polo refashion I'd left sitting around for ages. All it needed was a seam around the collar, but I couldn't get it to lay right the first couple of times I tried, so I gave up for a while. When I went back to it, I really don't know what the issue was to begin with. However, after wearing it once, I realized it was too long (awkwardly so) and didn't really bunch up nicely along the waist. I found (what I consider to be) an elegant solution. Full post to come, but for now, here's another sneak peak:


8. I also tried working on another Goodwill refashion. I think this one went even worse than the shorts - there is absolutely no way to make this wearable. *sigh* Inspiration:

http://www.cottonandcurls.com/2012/06/mens-button-up-to-summery-flowy-tank-top-tutorial/

[Image from: Cotton and Curls]

My disaster:

[Please ignore the mess in the background, and the ridiculous faces.]

This goes straight into the scrap pile, there's just no saving it.

9. Much more knitting, looking for a companion to the rainbow zigzags I mentioned a while ago. Unfortunately, this was also a failure, but...live and learn!

I also finally got around to altering some ill-fitting shirts.

So, I've definitely been busy, but sorry for the silence around here! I'll try to be better about posting in the future. :) (Hmm, and maybe actually finishing things I've started, oops.)


Tuesday, February 18, 2014

2 pledges in one

As I've discussed ad nauseum, I have a ridiculous amount of sewing crap (okay, treasures). Among these treasures are some awesome vintage patterns...which I am deathly afraid to cut into (/I'm afraid they're so far away from my size that I'll have to do a lot of alterations). (Side note - I finally took some time last week to document all of my patterns in Evernote - check it out if you'd like to see what I have and share advice and ideas!) But, as I've also discussed repeatedly, I just need to get over these fears and get to work. 

In that vein, I'm pledging myself to 2 new endeavors: the Vintage Sewing Pattern pledge and The Monthly Stitch's March theme: Miss Bossy Patterns.

http://www.astitchingodyssey.com/2014/02/vintage-sewing-pattern-pledge-will-you.html

http://themonthlystitch.wordpress.com/2014/01/28/announcing-the-march-challenge/

I'm not going to get overly ambitious here: I pledge that I will sew 1 vintage sewing pattern in 2014, and that my "monthly stitch" project will be completed...sometime in 2014. So, not exactly on time, but better late than never. 

Here's where I need your help: Tell me what to sew!

Option 1: Would this border on the bottom be too much?

Option 2: Could be cute as shorts, no?


Option 3: I like the dress on the right better, but there's not enough of the red to make that one. So really:
Option 3: right view with the green and white, or 
Option 4: left view with the red

Please leave a comment and tell me what you think I should make (let's be real, it's way past my bedtime and I am WAY too lazy to figure out how to post a poll here). Looking forward to hearing what you think!

Tuesday, January 14, 2014

As promised, UFOs!

(Don't make cheesy X-files joke, don't make cheesy X-files joke) That's right, today we're talking about Unfinished Objects! Almost every crafter I know has at least one of these lying around, and most of us have multiples (I think the only two exceptions I've heard of are my friend Allie, who has a one-track crafting mind, and the lovely LLadybird (she has a great post about her method here)). 

I, on the other hand, am a master at getting really into a project, and when things get hard or busy or boring, walking away for weeks or months (or years? oops). I took these photos when I started the projects below, but have yet to finish any of them. I'm sure there are more UFOs lying around my apartment, and as I make a serious effort to dig through/use up/organize my stash this year, I'm sure I'll be finding more of them. 

Polo shirt refashion 
Inspiration:

[Image from: Merrick's Art]
 
Merrick has a great tutorial on a men's polo shirt to women's comfy casual top refashion. (At one point I had another similar pin in my queue (that's how much I liked it!), but I liked Merrick's tutorial better.) She made it look so easy, and, when I found this slightly less than perfect shirt of my dad's in the Goodwill pile, I knew I had to try it for myself. 


This picture is super unflattering (I swear there's a shape hiding under there, and I cannot for the life of me get it less yellow), but, knowing that I didn't have much to lose, I dove right in and started cutting!   


I actually managed to get a pretty decent fit on this one before it wandered into UFO-land, too. Alas

Why did I stop?

I cut the neck line a little too wide, unfortunately, and when, after a lot of fighting with the serger, I still couldn't get it sewn down properly, I had to walk away. I think I moved shortly thereafter, and haven't managed to dig this out again.

Time in purgatory

I started this in...May 2013? Dang, that's embarrassing, especially considering I was so close to being finished!

Plans to finish

Eh, I'm not even sure where this is right now, and it's too cold to wear it, anyway. I would like to finish it sooner rather than later, though! What's stopping me now is that both my serger and my sewing machine are in need of some TLC, and that's just NO FUN, so instead of sucking it up and taking the time, I just keep working on bits and pieces of easier projects.

Zigzag rainbow...something
Inspiration:

http://www.purlbee.com/the-purl-bee/2012/11/30/two-purl-bee-classics-now-in-super-soft-merino.html
[Image from: Purl Bee Soho]

I saw this super-cute Chevron Knit Baby blanket and knew I wanted a larger version. I still had quite a bit of yarn left over from my granny square blanket, so I figured I'd put it to good use!

 [Sorry about the funky draping, it's still on the needles, which aren't long enough to spread it out all the way.]

Since I had varying amounts of yarn left, I decided to do the rows in a 12-10-8-10-12 pattern, which worked until the second-to-last row, where the amount of yarn I had left me one row short.

Why did I stop?

The aforementioned shortage of yarn (I'm not sure what kind of a solution I was hoping to come up with, but no, yarn did not magically grow while I let the project sit). It's also not really big enough to be much of anything right now. There are no babies in the family, and I'm out of my rainbow stash of yarn. In fact, I'm out of most of my entire stash of yarn. I was thinking about getting some new black and white yarn (*gasp* I know, but it's not considered breaking the rules if it's bought to finish a project) and doing a solid colorblock, rather than so many rows of alternating colors, right next to this piece, but I think the blanket would still be too short. My original plan was to have 4 similarly sized pieces in various colors, but...that might be overly ambitious. 

Time in purgatory

I started this in October, and worked on it pretty steadily until just before Christmas. As with my cowl, I have to rip out almost every row of this. I invariably K2FB instead of K2T, or vice versa, and sometimes my counting is way off. Ugh.

Plans to finish

I actually just recently picked this up again and used up the last 2 colors! Now to figure out what comes next...

(Mom, if you're reading this right now, STOP!) :)

Stencil text on pillows

Inspiration:

DIY pillow cases
[Image from: Wit and Whistle]

If you guys are on Pinterest as much as I am, I'm sure you've seen this (or a similar) picture floating around.

I knew I wanted to make one of these, but I couldn't quite decide what I wanted it to say. I was shopping at Hancock Fabrics one day and found a couple of these in the remnant bin:


This one alone is almost a full yard, and I'm pretty sure this was during a half off remnant sale, so it only cost me $1! 

I was fairly certain that I had the rest of the supplies I needed lying around, too, but a day of digging through the basement didn't yield the stencils I knew I had, so I picked some up at JoAnn with a half off coupon.


I used to love this pillow set, but it's kind of stained and not really suitable for company anymore, so...into the new pillow cover it goes!

Eventually, it dawned on me what I wanted to write on here - the lyrics to "You Are My Sunshine." My mom always used to sing it to me as a kid, and I knew she'd love this sentimental, hand-made gift. (Although, when you look up the lyrics to the entire song, they're a bit...disturbing. Not quite as sunshine-y as you'd think.)

I got to work with my stencils, a pencil, and a ruler and tried to cram all of the text on to the pillowcase. I accidentally traced the same chunk of text twice, which was frustrating, but eventually fixed it. I realized I'd have to leave out the "please," but otherwise I'm happy with the way this turned out!


Why did I stop?

I think that I was afraid that, in washing out the pencil lines, the marker would bleed through (even though I'm pretty sure I used a special fabric marker - go figure). Then, aforementioned move meant that this got buried in the bottom of a bin.

Time in purgatory

This was also started in May 2013. :( I was on a roll back then...too bad I couldn't finish what I started!

Plans to finish

I finally dug this thing out of the bin I'd stuffed it into to photograph it, and it is now lying on my floor, where it will stay until I can finally get the darn thing washed! After that I just need to iron on some interfacing and pick out a back piece. I initially thought I should use the same fabric for the back, but now I think it might be nice to give it a pop of color and interest. Time to dig through the stash!

Friday, January 10, 2014

Let's talk about WIPs

For those not in the know, WIP stands for work in progress, and I've got quite a few of those going on right now. I was going to do a combined post with my UFOs (unfinished objects), but since there are so many of both, it'll have to be a two-parter. 

First up:

T-shirt quilt for my BFF. She's been complaining that I robbed her of her entire wardrobe to make it, so she'd like to see the quilt sooner rather than later. I told her that it's way past time for her to stop wearing college t-shirts anyway (she graduated 6 years ago). Still, I figured this would be an easy way to get started sewing again.


These are all of the shirts she gave me. I'm mostly just winging this in terms of finished measurements (as I did with my own). I decided not to cut into all of these because I wanted the quilt to be 3 shirts x 5 shirts and didn't end up needing all of them.  


The largest logo is almost 12.5 inches wide, so that settled the question of square size -  13 x 13! Alas, I realized too far in that 2 of the shirts weren't wide enough (my BFF is tiny), so I'll have to do some creative fixing. 

 [The small ones are hiding - I can't deal with them right now, still kinda bummed about that one.]

[All of the cut-out squares]

Next step: iron interfacing to the back of all of these - at least that step will keep me warm and humidified during the cold, dry Chicago winter!

Last(ish) WIP:

My Dexter boyfriend cowl (because I've exclusively been knitting this while at my boyfriend's (yay for following resolutions so far!) or while watching Dexter, or both):


I've been using entirely stash yarn for this, leftovers from some sock monkeys I made for my mom, I think. I recently started adding in some light gray leftovers, too, since I didn't think it would be long enough with just the beige and brown. I really like the random stripes so far - it's very freeing to not have to follow a pattern so strictly, or worry about counting stitches or rows, as with my sidelined knitting project.

The goal is to have one of these before winter is over:

http://www.ravelry.com/patterns/library/brioche-infinity-scarf
[Image from Unneva]

I swear this thing might be the death of me. It's a super simple stitch, and is very thick and cozy, but it is impossible to correct dropped stitches. Usually what happens is: I'm watching Dexter, knitting along, and I realize that I've dropped a stitch 3 or 4 rows earlier. It's always very obvious, but I have no idea why I don't notice sooner (other than the TV, I guess). I then have to rip out those 3-4 rows, and usually 5-6 rows BEFORE that to correct the mistake. So I've probably knit enough rows to almost complete this thing by now, but have ripped out half of it. Sigh. 

Looking at the other pics, I also maybe should have gone with bigger needles, but...no way I'm ripping that sucker out now! It'll be really nice to have this done and retire my semi-hideous scarf/hood thing.

In my next post, I'll detail all (some) of my UFOs, which I am now determined to finish sooner rather than later!